
Problem.
Just resting in bed one morning, engine running. Suddenly it started making a crunching noise. Sounded ominous.
Ran out and immediately turned the engine off.
This happened twice or three times. A loud metallic crunching sound.
Next day when I started it up, it began overheating quite badly.
Overheating
Most of the coolant ended up squirted all over the engine compartment floor.
When I started the engine, after about an hour, it started ‘boiling out’. The coolant was just boiling off the top of the cylinder heads and being forced out.
This can point to a badly bled system, or a more serious problem with your cooling system.
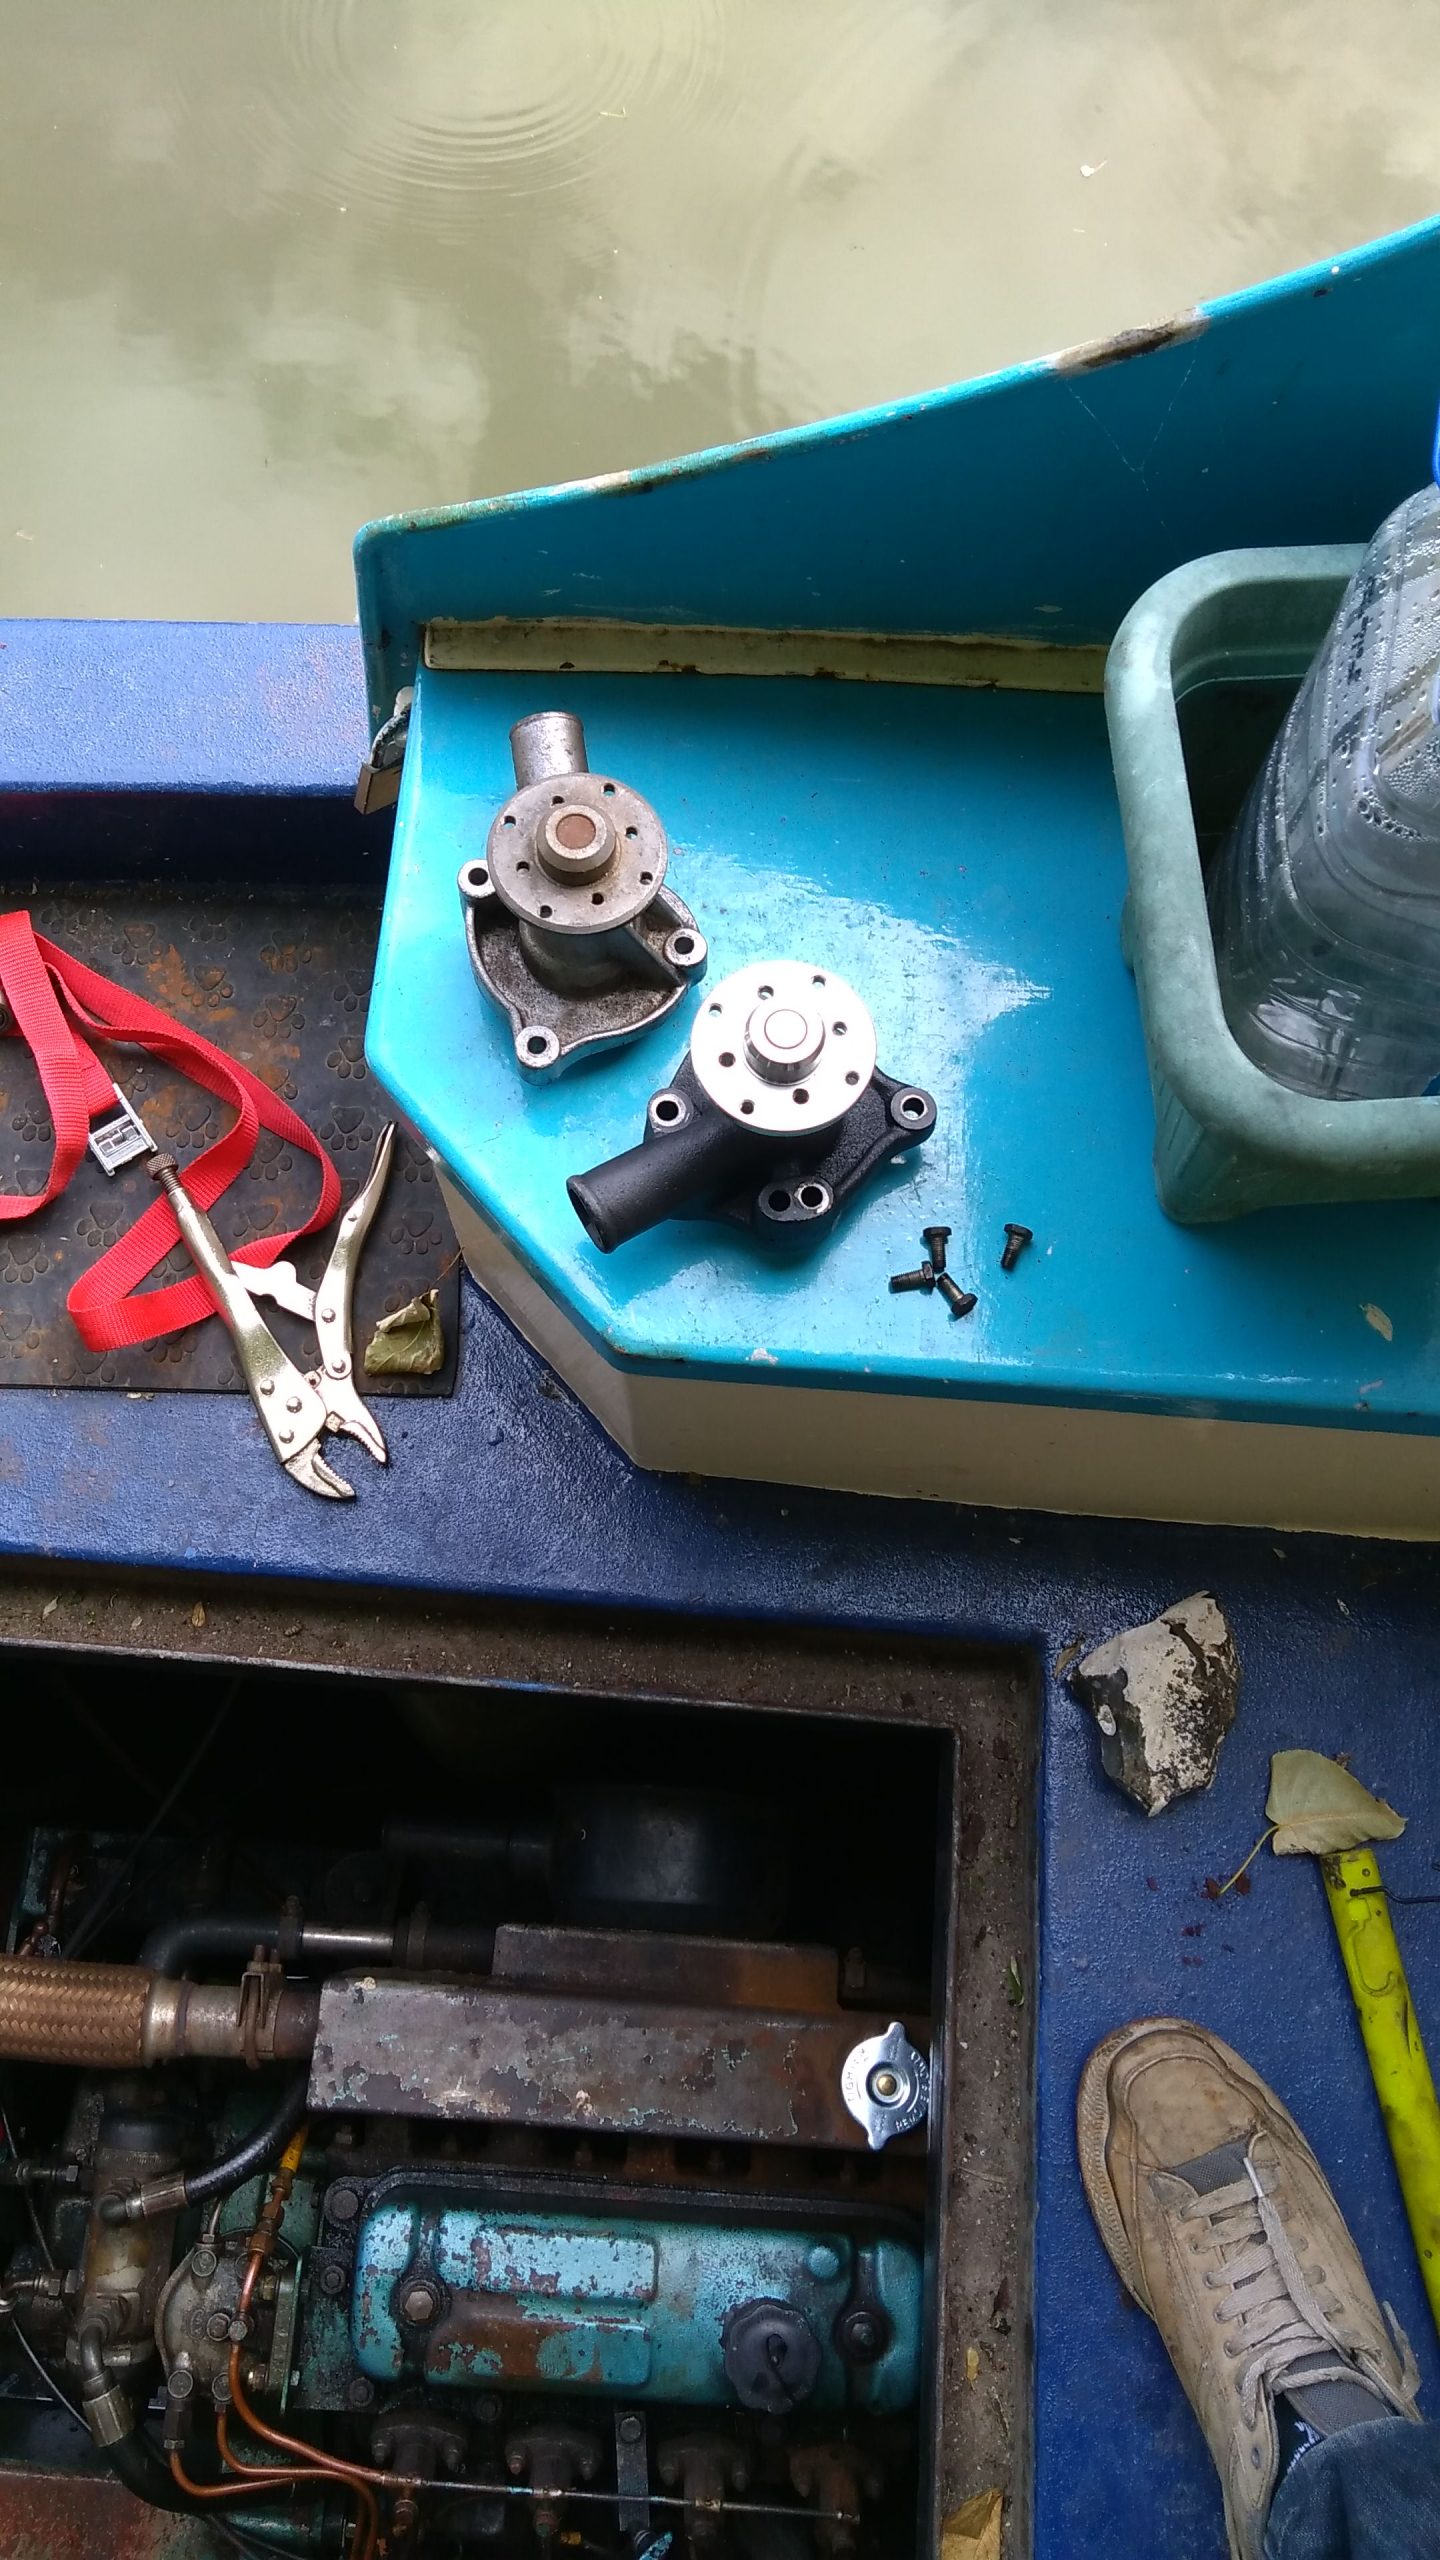
BMC 1,800 marine waterpump
After talking to a couple of people, I was fairly convinced that the problem was with the waterpump.
Symptoms including:-
- Metalic crunching sound; the pump scraping on it’s housing.
- Overheating.
- No oil in water or water in oil: Not being a problem with the head gasket.
Procedure for removing waterpump
The waterpump resides behind the engine. The fan belt rotates around it, along with the alternator and the drive-shaft.
- Loosen screws on waterpump wheel: There are four nuts that need to be loosened.
- Loosen alternator: Slacken the belt off.
- Remove waterpump wheel: Fully take nuts out and gently lever the wheel from the waterpump. Keep this, you will need it later!
- Remove water from your system: Pick the place where the cooling system piping is at it’s lowest. Remove the pipe here and bleed the coolant out.
- Remove pipes: There’s a pipe which connects the waterpump to the cooling jacket. Carefully remove this.
- Remove waterpump: There are 4 nuts and washers holding it on. Slacken these off and remove the pump.
You should be left holding your old and broken waterpump in your hand.
You may want to dispose of this in the best way you see fit.
Fitting the new waterpump
- Align the gasket properly: You’ll be provided with one of these with your new pump. Make sure it’s aligned.
- Fit pump: Ensure the bolts are done up to the correct torque settings.
- Reconnect cooling pipe: Ensure that it’s jubilee clips are done up well and not leaking.
- Re-fit belt and wheel: Onto the waterpump.
- Re-tighten belt:
- Add coolant: 50% mix is recommended. Can go as low as 25% to be effective.
- Bleed: Not to forget this one! All your work will be in vain if you don’t. Find the bleed screw, loosen it let the excess air out until there’s water flowing. Then tighten it up again.
Hey presto.
You’ve got a cooling system that works again!
Related Reading

Welcome to Banbury! When I went down to the car this morning, someone had parked very close behind me. Maybe 4-6 inches away. I moved...

In the 1990’s, a political scientist named Stanley Feldman developed a set of four very simple questions to related to parenting to test the level...

This is a short guide to installing flexible solar panels to a narrowboat. How long do flexible solar panels last for? No doubt, less long...

A hiking trip for Mount Rinjani in Lombok

60+ mysterious deaths of high powered bankers from 2008 - 2024
Wonderful…brilliant piece of work
Glad that you got to number 7 ! How easy to find the bleeding screw ?